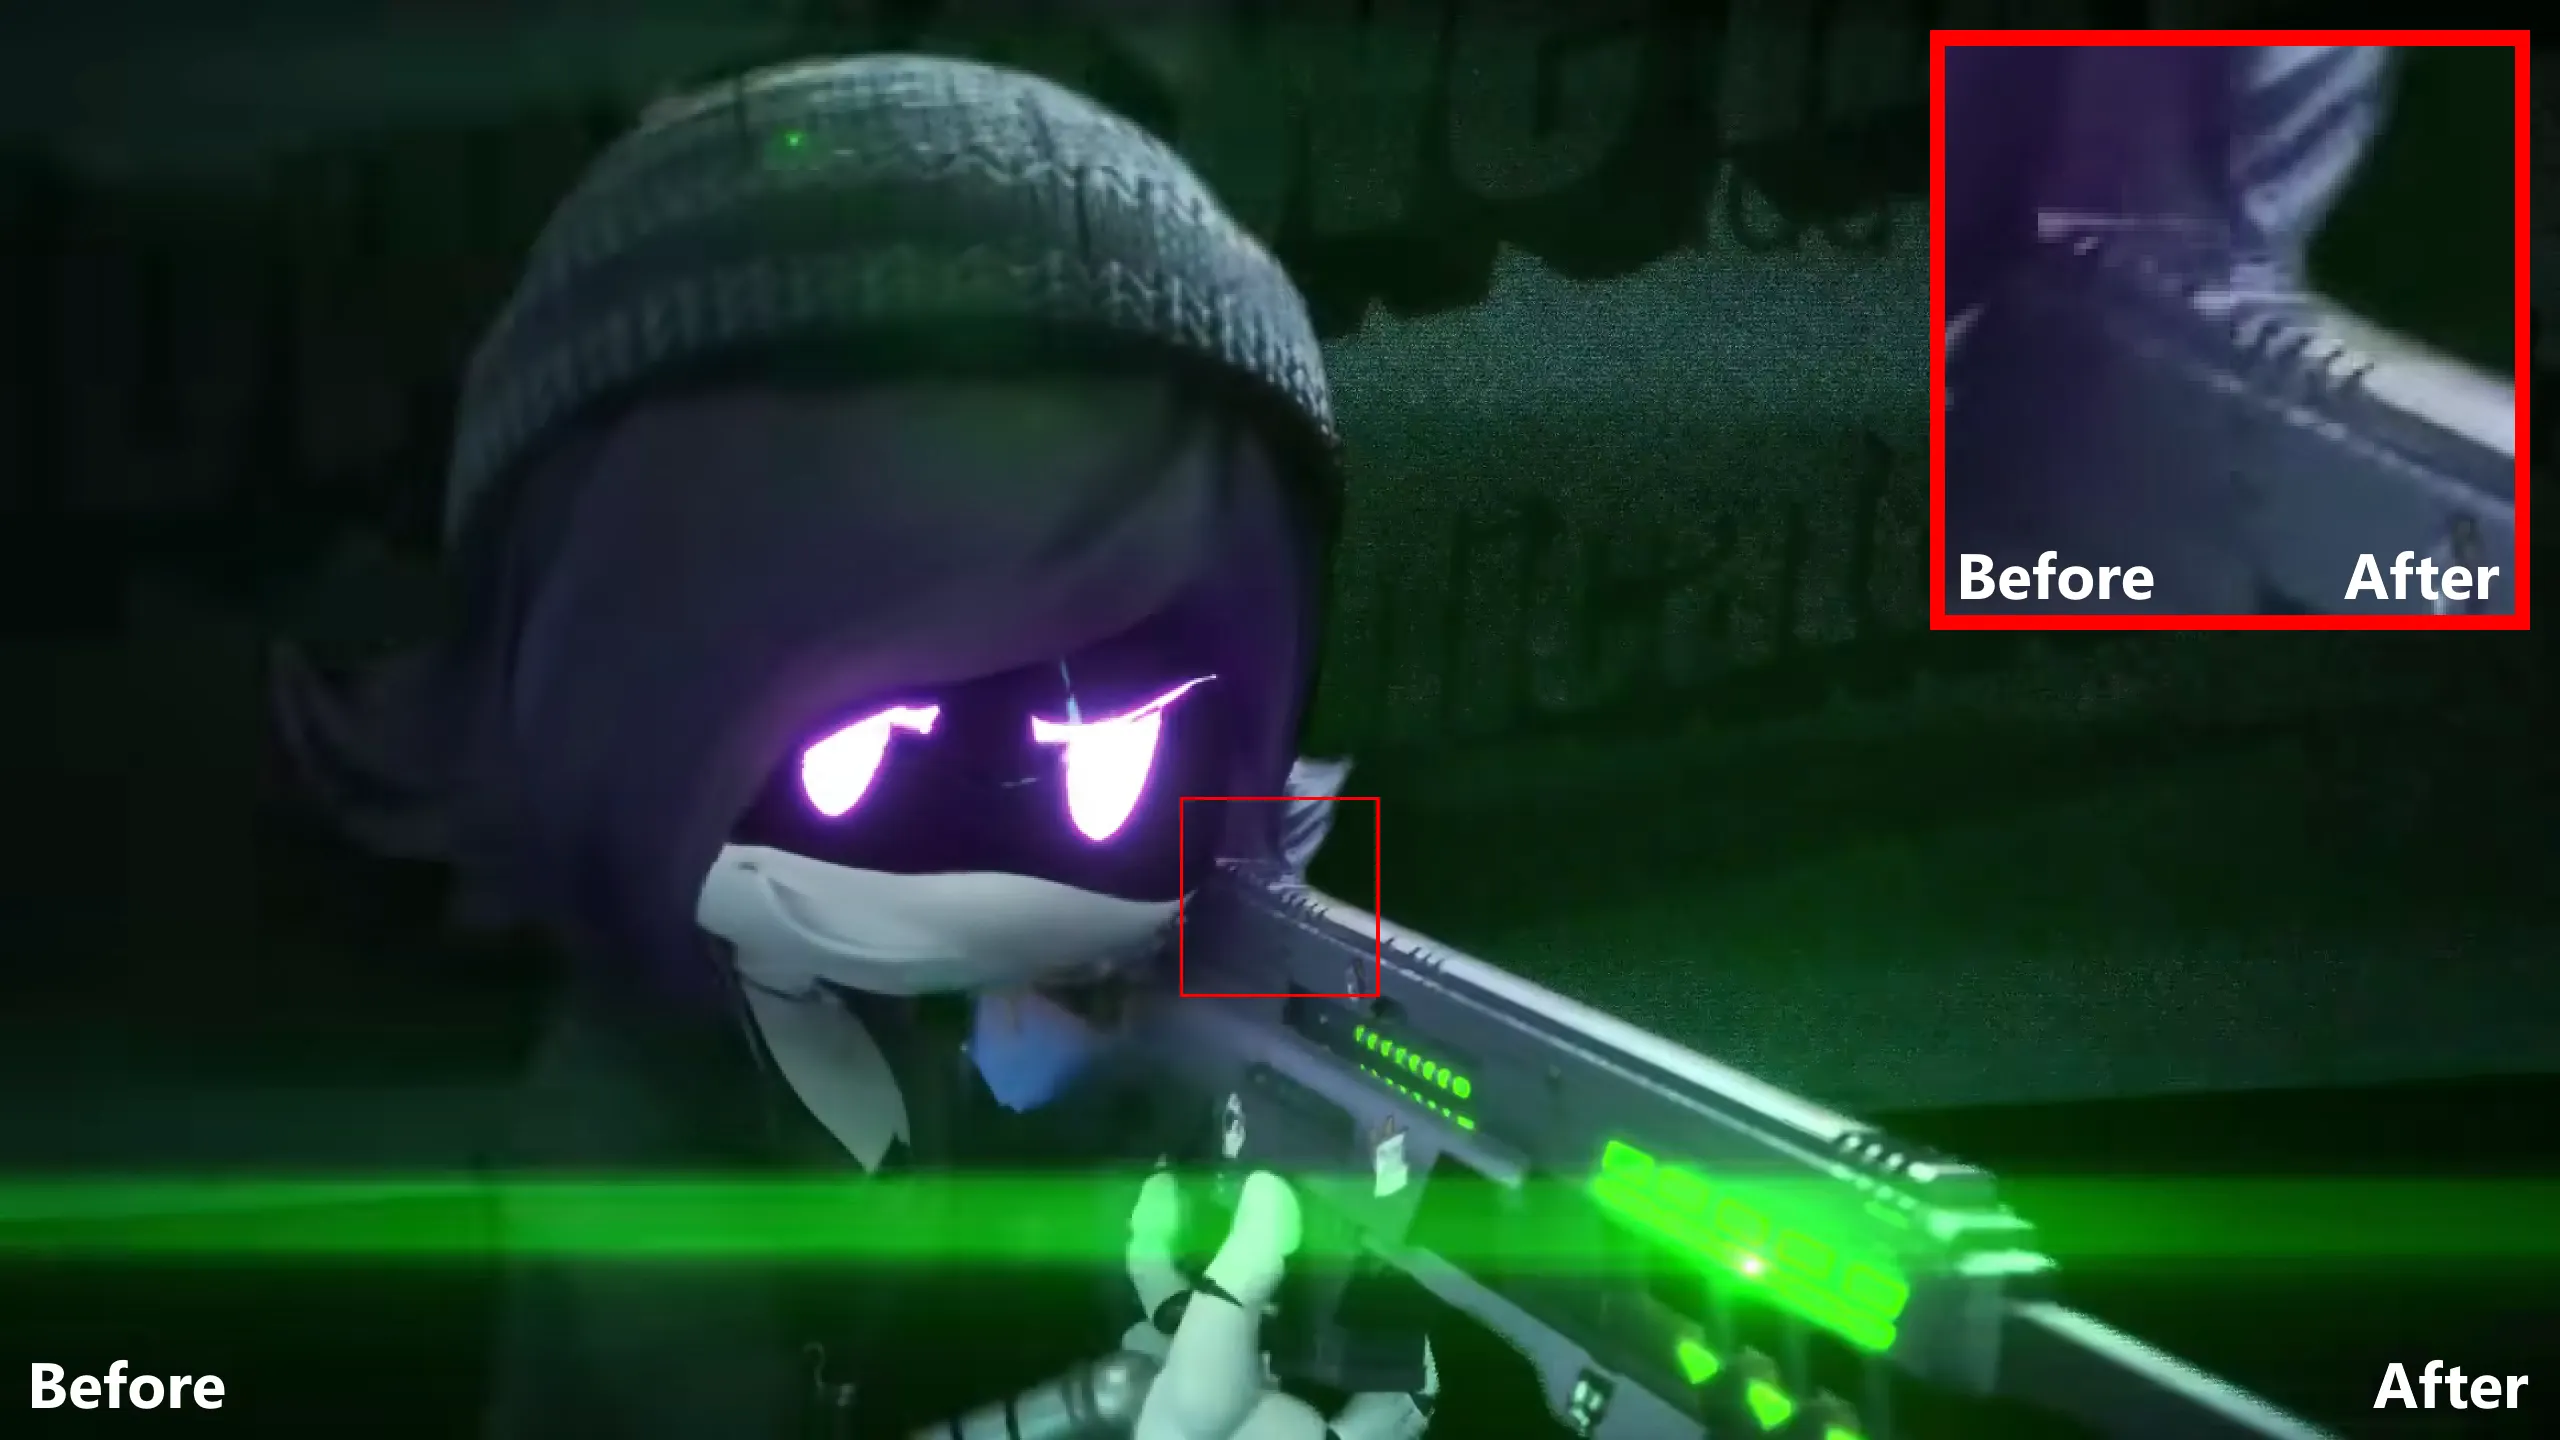
Once upon a time, I pay a visit to the Murder Drones Wiki on Fandom. What I look is a barren desert, persumably because it’s been a while since the release of the first episode. What’s also caught my eye is the screenshots, which has a room of improvement. Hasty, watermarked screenshots of the player on YouTube, low resolution, cropped images, are some of the problems of these screenshots. In comparison, the first episode is rendered in 2560x1440. What if we somehow can take the frames of the original episode and update these images?
On the first image, I decided to do my own frame-finding and uploading, but then I found out that there is a lot of it. No way I’m going to do all of this by hand. That’s where “programming” comes in to the rescue. So, here is what I did.
The source code of this project can be seen on https://gitlab.com/Hans5958-MWS/fandom-murder-drones.
Please be wary of the legality of this. In terms of fair use, you actually want to keep this in minimum but still recongnizable for education purposes. If you want to keep it from being non-free, perhaps you want to try this on something like Big Buck Bunny (CC BY 2.5) or Sintel (CC BY 3.0).
Downloading the target images
I want to get the original images of each file, and as far as I learned about MediaWiki, one way to do it is to access the pages on it, which inside them has the original link. But unlike something like Wikipedia or Wikimedia Commons, you can’t access these pages anonymously, so I have to do it in a roundabout way.
To get the list of the files, I need to use AutoWikiBrowser, which gives me 965 files at that time. My code saved it on files md.txt. After that, I use Python to scrape the pages and get the URLs to the original files, after supplying my Fandom cookie in it. Beautiful Soup is used here, a library for all things web scraping.
The relevant code can be seen on scraper.py (or scraper.py.example). It saves the target images to files/ folder.
Retrospect: Using the Action API
Upon further investigation, there’s one other method that I forgot to explore at that time: the Action API.
After a little bit of research, it is actually possible to obtain the URL to the original without giving tokens or scraping. For example, you would need to do this if you want to get File:N7.png.
https://murder-drones.fandom.com/api.php?action=query&format=json&prop=imageinfo&list=&titles=File%3AN7.png&iiprop=url{
"continue": {
"iistart": "2022-06-29T02:12:38Z",
"continue": "||"
},
"query": {
"pages": {
"322": {
"pageid": 322,
"ns": 6,
"title": "File:N7.png",
"imagerepository": "local",
"imageinfo": [
{
"url": "https://static.wikia.nocookie.net/murder-drones/images/4/4a/N7.png/revision/latest?cb=20220629033754",
"descriptionurl": "https://murder-drones.fandom.com/wiki/File:N7.png",
"descriptionshorturl": "https://murder-drones.fandom.com/index.php?curid=322"
}
]
}
}
}
}Downloading the source
Next up is to download the source video. I just use yt-dlp for this and get the highest/best quality. My command would be something like this, the -f switch is what makes it get the best quality possible.
yt-dlp --no-check-certificate --console-title -f bestvideo*+bestaudio/best -o "%%(title)s.%%(ext)s" --no-playlist --add-metadata https://www.youtube.com/watch?v=mImFz8mkaHoAny format of any video should’ve work, as long as Python can read these videos. For YouTube, that yt-dlp command would result in a .webm video, but it should work on something like .mp4 or something else. The script on the repository reads from source.webm.
Preparing the reference hashes and figuring out the comparison
There are some resources that uses pure OpenCV to compare between images, but I decided to also use ImageHash libary, specifically the average hasing method. It seems that it would produces smaller values when comparing two images from difference source on the exact time, compared on comparing two images from the same source, one frame apart. I also settled on the length of 128 bits. You want to test this further and see which method works for you. For example, maybe you want to use perceptual hashing.
It is better to do an initial calculation to count the hashes of all of the reference frames. Now it is possible to calculate it on the fly while comparing the target images, but there are 48450 frames on the video, and the library does 20-30 hashes/seconds on 96 bits in my computer, times how many target images that are going to checked. So, it is better to prepare these hashes first; the target images hashes can be calculated on the fly since they are unique, unlike the video.
It would take a long time. Beside figuring out what method to use and how many bits to use, I have to repeat the whole process twice, because I somehow messed it up, making me need to start over.
Later, it is possible to use MoviePy to read these frames. For this stage, the related files are preparehash.py or preparehash_moviepy.py. Either one of it can be used, which should result similar hashes.
Here’s an adjusted and abridged version of the MoviePy version. Refer to the code on GitLab if you need more information. My code saves these hashes on ref-hashes.txt, each line is for the hash for one frame.
for frame in video_moviepy.iter_frames():
	frame_pil = Image.fromarray(frame)
	hashes.append(str(imagehash.average_hash(frame_pil, 128)))
Comparing target images and getting the high-quality frame
Now it is the time to compare the hashes of target images with those on the reference. The hashes on the reference video has been generated, and for the target images, the hashes would be generated on the fly. Make sure you have the same ImageHash configuration for these two.
The comparison is simple: For every target image, get the frame from video with the least hamming distance, meaning it would need to iterate all the frames. That would be a complexity of O(N*M).
I bet there are faster ways to compare all of the frames and images, which I have tried and to no avail. If you have a better idea, I would like to hear from you.
After getting the closest frame, I am a little bit stumbled on how to get the frames. Here are the three ways that I explored. My code should save on the hq/ folder.
Use pure OpenCV
Since last time we can just use OpenCV, my first thinking is that I could also just use OpenCV. So, that’s what I first tried.
Problem is, the new images are quite off. Upon further investigation, the times that the script getting are in the right ballpark. I assumed that this is an issue when using OpenCV; not related to the hash comparison.
Even so, when I come back to this, these problems are gone. Not sure what fixed it, but just so you know that it is possible.
Use FFmpeg
As someone who often use it, FFmpeg is also another choice. FFmpeg is swiss-knife to handle videos, audios, and other multimedia files. It is out of my common knowledge, but one search away and I got one.
The issue is that it is way too slow. In this kind of job, you have to seek to that specific frame. In the other methods, the stream is kept for the next job on the queue, but in FFmpeg, this stream is dropped, only to be read in the next iteration. This obviously affects the time, and by a lot.
Also, for some reason it also outputs more brighter frames. I don’t know what causes this, but I have tried adjusting the settings, including the color space, to no avail.
Use MoviePy
After two of those, I tried to search for another Python library. I found out MoviePy, and decided to give a try. Turns out it is much easier to use than OpenCV, and the frames are in the spot. A perfect solution.
I found out MoviePy at this stage. As a side quest, I come back to the previous stage (reference hash preparation) and tried to use MoviePy, with same results.
Here’s the abridged code of all three methods combined. This is implemented in compare.py.
index_target = 0
for hash_target in hashes_target:

	smallest_diff = math.inf
	smallest_frame = -1
	frame_ref = 0
	index_ref = 0
	for hash_ref in hashes_ref:
		if smallest_diff > abs(hash_target - hash_ref):
			smallest_diff = abs(hash_target - hash_ref)
			smallest_frame = index_ref
		index_ref += 1

	if smallest_diff < 3000:

		# OpenCV
		video_cv2.set(cv2.CAP_PROP_POS_FRAMES, smallest_frame)
		ret, frame = video_cv2.read()
		cv2.imwrite("hq/" + name_target[index_target], frame)

		# FFmpeg
		subprocess.run(['ffmpeg', '-ss', str(smallest_frame/30), '-i', video_name, '-frames:v', '1', '-q:v', '1', '-vf', 'scale=out_color_matrix=bt709', '-color_primaries', 'bt709', '-color_trc', 'bt709', '-colorspace', 'bt709', "hq/" + name_target[index_target], '-y'])

		# MoviePy
		video_moviepy.save_frame("hq/" + name_target[index_target], smallest_frame/30)

	index_target += 1
Retrospect: A little bit brighter?
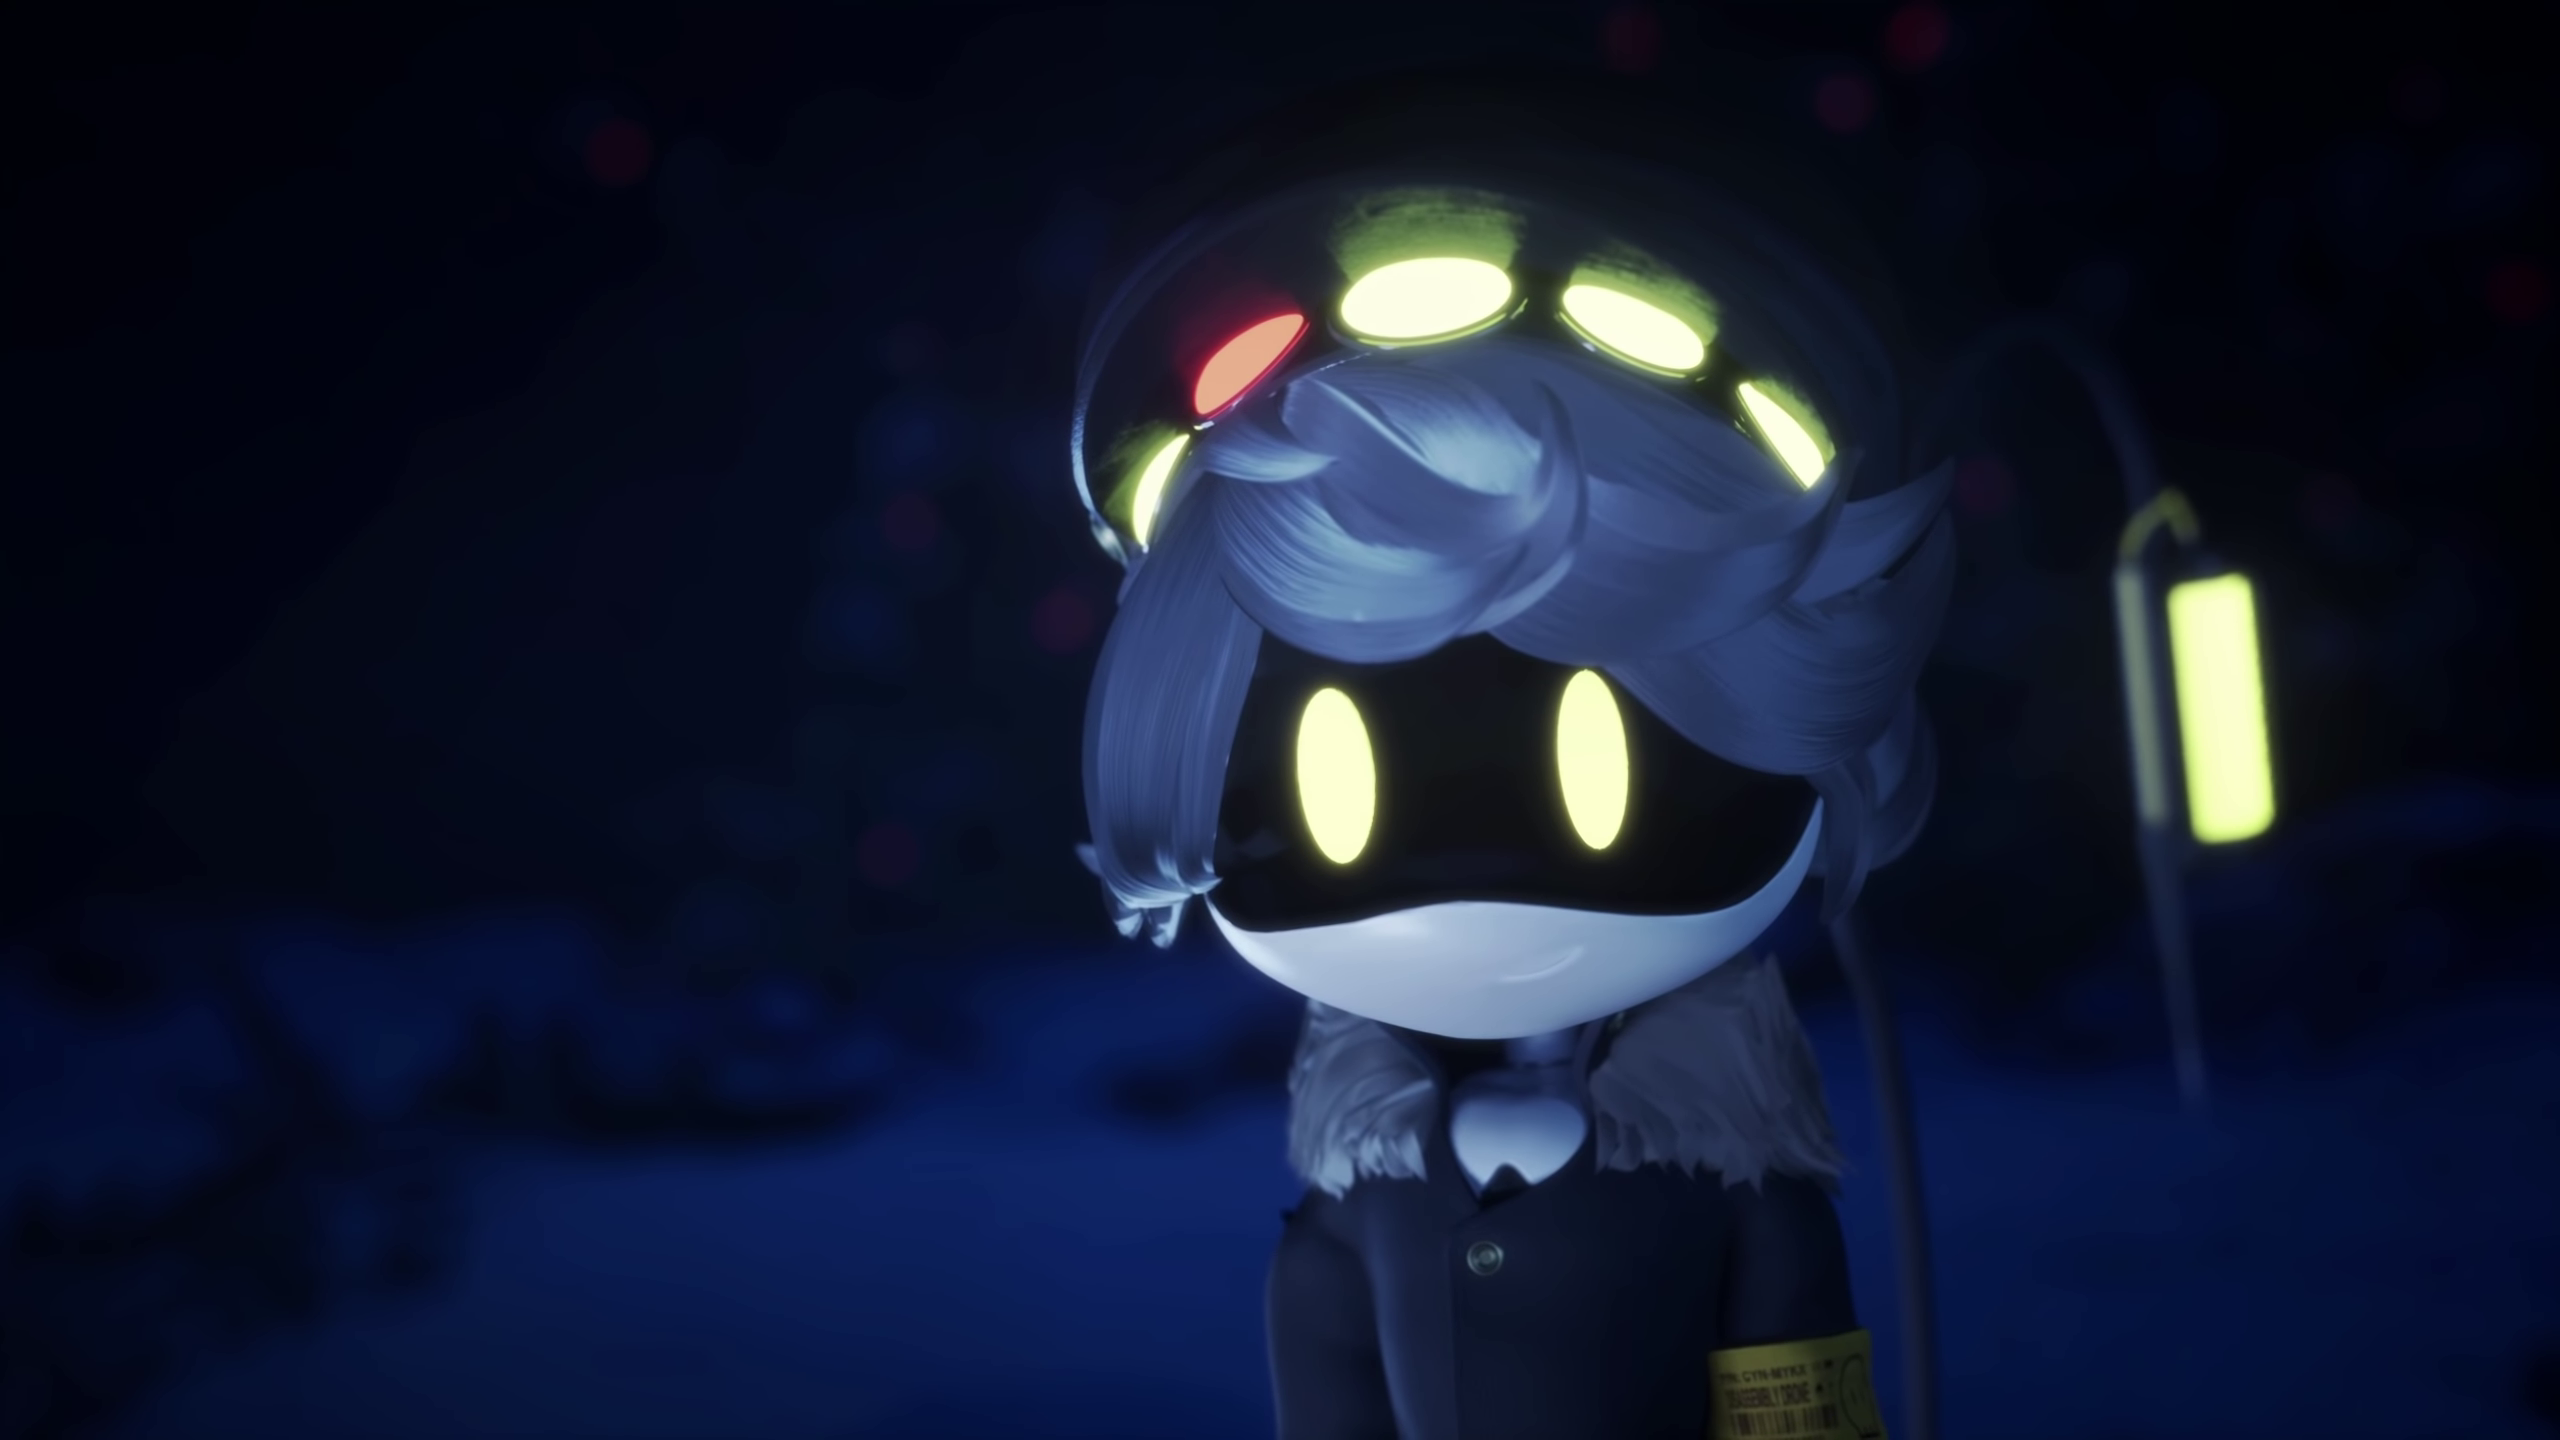
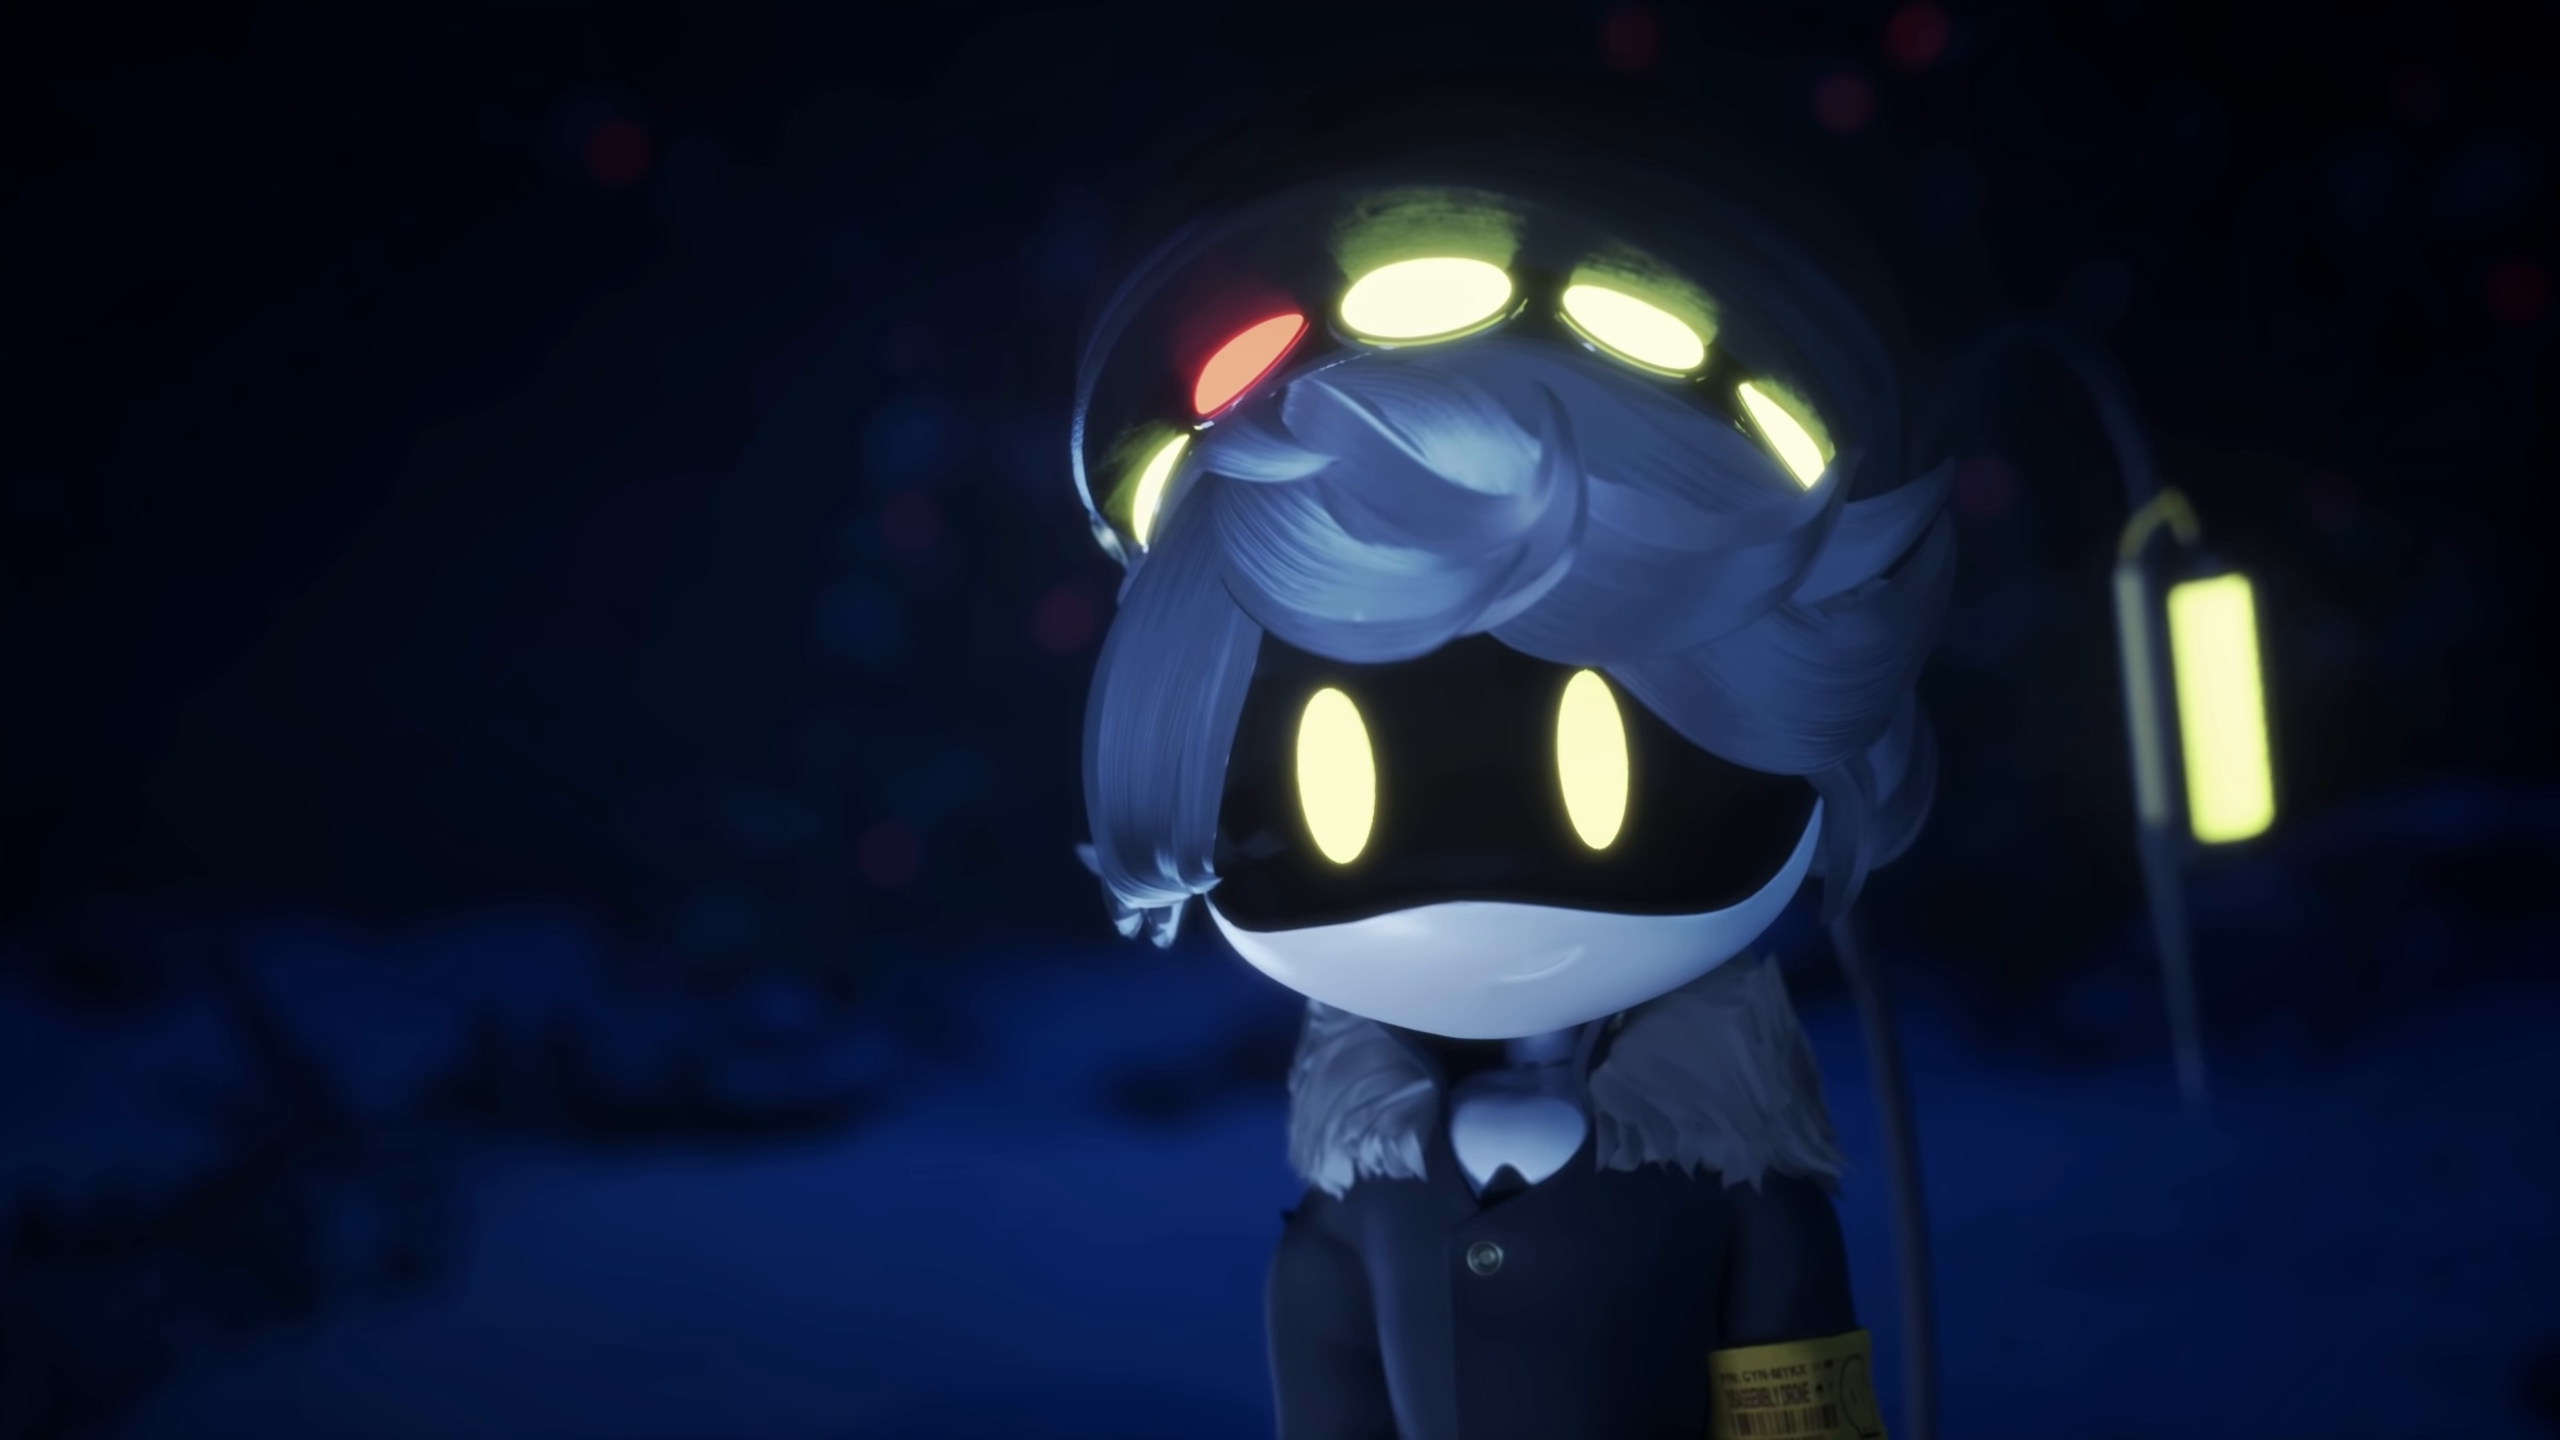
At the time of writing this article, I decided to compare all three methods, along with a VLC screenshot as my baseline.
While the FFmpeg frame is brighter, the MoviePy frame is slightly brighter compared to the VLC screenshot. The difference may be negligble; I have to crank up the brightness of the screen to notice the difference. For the frame from OpenCV, I didn’t see any noticable difference in terms of the brightness compared to the VLC counterpart.
Shown below are the screenshots/frames that I compared one to each other, in which you can compare yourself.
| VLC (base) | OpenCV | FFmpeg | MoviePy |
|---|---|---|---|
 |
 |
 |
 |
Uploading the HQ frames
It’s time for uploading our new fresh to the respective pages. This is done using Pywikibot. You have to set it up first before proceeding, which the link that I gave should explain all of it.
After this, all it takes is to have a script that loops through all the images on the hq/ folder and run the upload script on Pywikibot. Here’s the code that I use, which you can check on the repository on upload-pwb.bat. That script gets Pywikibot from pwb/, by the way.
for /f "delims=|" %%f in ('dir /b hq') do python pwb/pwb.py upload -summary:"Best quality from video source" -keep -ignorewarn "hq\%%f" -descfile:"empty.txt" -noverifyClosure
Again, I have uploaded the source code on https://gitlab.com/Hans5958-MWS/fandom-murder-drones. This GitLab repository has everything that I’ve done and you need (minus some secret credentials). Just, please don’t do anything bad. (Or, just do it. No warranty given, anyway.)
To see the uploads that I made, check out the Special:Contributions of mine on 1 July 2022.
That’s all of the project. I am pretty glad with the outcome of this. I just hope I don’t get into trouble. Anyways, I hope you enjoyed, or at least found it useful.
PS. Do you know what happens when you did a project months ago and then doing the writeup later? You forgot most of it. I really wanted to do this writeup, and so, with another run, this is my attempt to recite it. I hope it is straight-forward enough for you to learn something about it.